
 by George Pandelios/photos by the author
While we had successfully completed the biggest and most difficult step of pouring the river in Part 5, the work needed to finalize the scene remained. The areas of focus were the foreground of the Eastern Approach (track, ballast, line poles), the scenery between the Eastern Approach and the west side of Pier 1 (backwater, steep hillside), super-detailing of the bridge (railings, portal), and the final assembly and placement of the bridge back on its piers.
Bridge Detailing
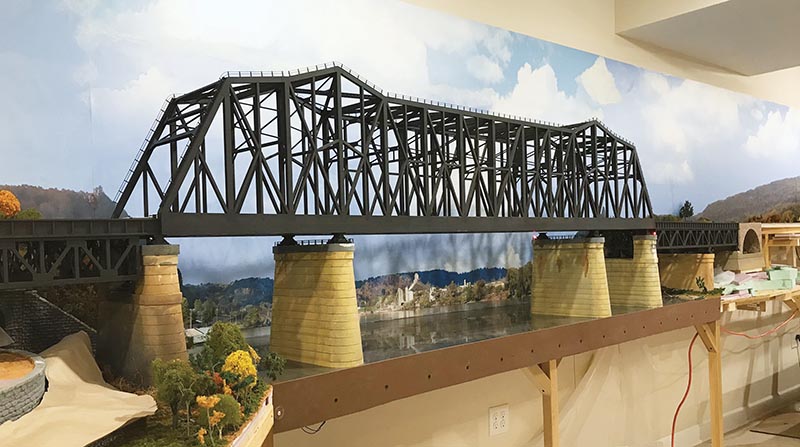
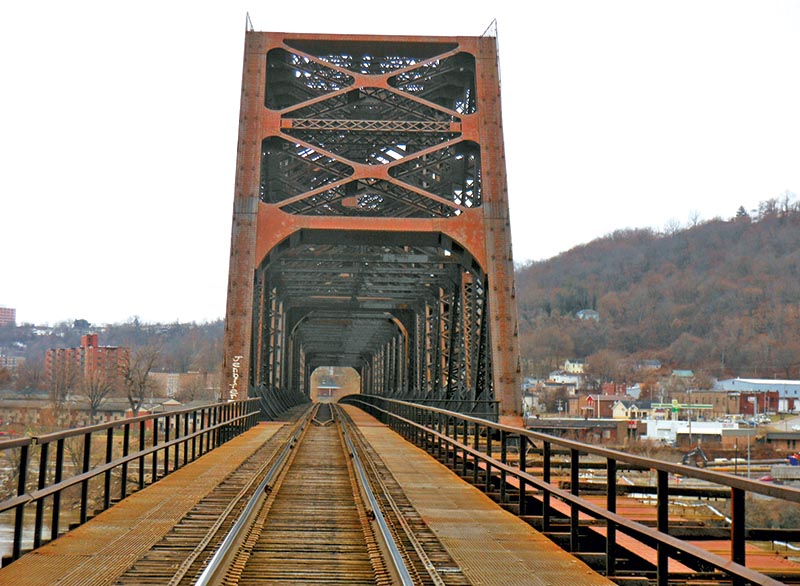
I very much like the bridge I commissioned from Custom Model Railroads. They did a spectacular job. Nothing I’ve seen on the market before or since has come closer to the prototype. The tale of its acquisition is interesting as well, but we’ll save that for another time. I wanted to see if I could add some details and so improve the appearance of the main span’s superstructure and portals. Photos 1-3 show the prototype’s Pennsylvania Railroad hairpin railing and the massive portal’s facade. The railing ran the complete length of the superstructure, with ladders on the portals enabling access to the top of the bridge.
Before starting the work, I covered the bridge’s deck to protect the track from glue and dirt. Photo 4 shows the appearance of the model bridge’s main span before the start of detailing. Note the undecorated crosspieces on the portal. To better represent the appearance of the prototype (Photos 1, 2), I designed structural crossbeams (Figure 1) for the portal and the top of the superstructure. These were test fitted on the portal as shown in Photo 5. The other details to be applied were railings and ladders.
Because the bridge is not true O Scale (the prototype’s length of 1,902’ would have resulted in a model more than 39’ long!), a liberal amount of modeling license and HO scale components were used to achieve a proportional look. The railings are a Shapeways product, while the ladders are Plastruct No. 90422. Both were spray-painted flat black. The railings and ladders sit on top of a thin (0.015” styrene) strip 5/8” wide intended to portray the real bridge’s box beams. For the top of the bridge, this long strip narrows to 1/2” wide.
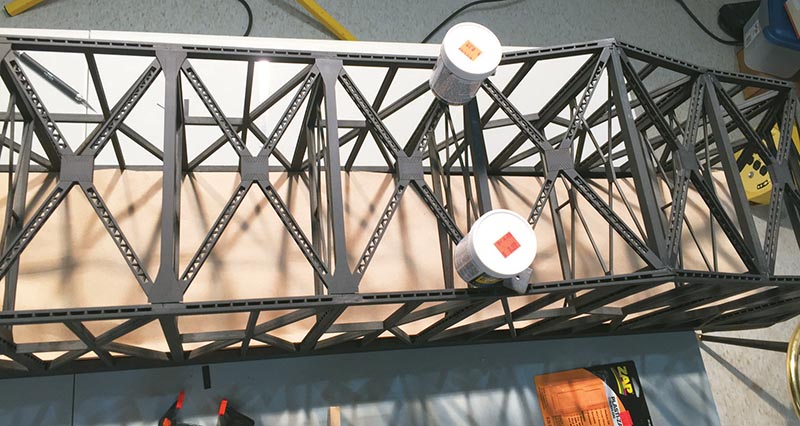
I started on top of the main span by installing crossbeams. These sit atop the wooden, undecorated crosspieces. I worked my way out toward the ends of the bridge, attaching crossbeams to the underlying crosspieces (Photo 6). One of the really useful things I acquired somewhere is a set of low-tension spring activated clamps. I have no idea where they came from, but they are labeled “Redi Shades,” a brand of temporary house curtains. Unlike some clamps you can get commercially, these are not so strong as to distort or warp the items in question.
Photo 7 shows the peaks and valleys of the superstructure where these are really useful. Crossbeams were glued using a combination of E-6000 and a medium CA. I used the E-6000’s slower drying time to get the position of the crossbeam correct atop the wooden beam. The medium CA holds the wider ends of the crossbeam in place. These were clamped as shown…
Read the rest of this article in the July/August 2022 issue of O Scale Trains. Subscribe Today!