
 By George Pandelio/photos by the author
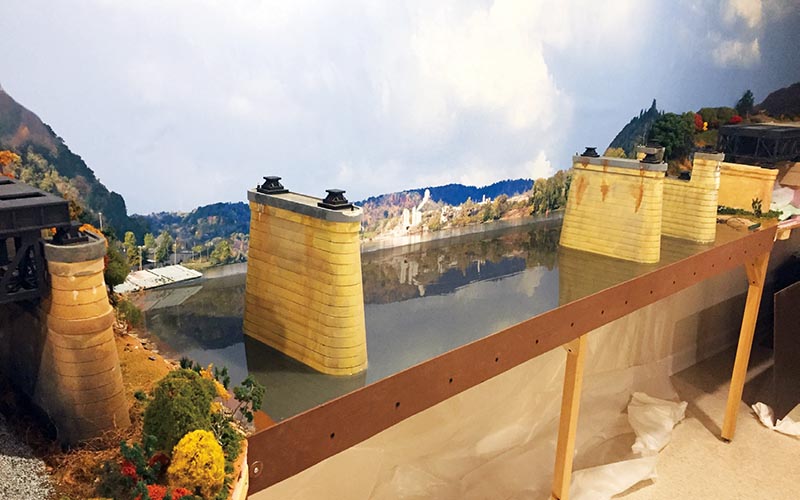
Continuing from where we left off in Part 4 (Issue No. 120 of O Scale Trains, March/April 2022), I mentioned that one of the biggest challenges was the size of the Ohio River on the layout. It was daunting, nearly 8’ across and between 22” and 30” wide — roughly 2,392 square inches. It was vital that the river’s footprint did not overlap any joints in the benchwork. I took steps to make sure that the river fit on a single 30” x 8’ piece of plywood.
The initial run of the online Woodland Scenics Volume Estimation tool told me that at a depth of 1/4,” I would need 332 ounces of Deep Pour Murky Water. That worked out to 28 boxes of the stuff, each box yielding 12 ounces of liquid. But as we would find out later, these weren’t the final numbers.
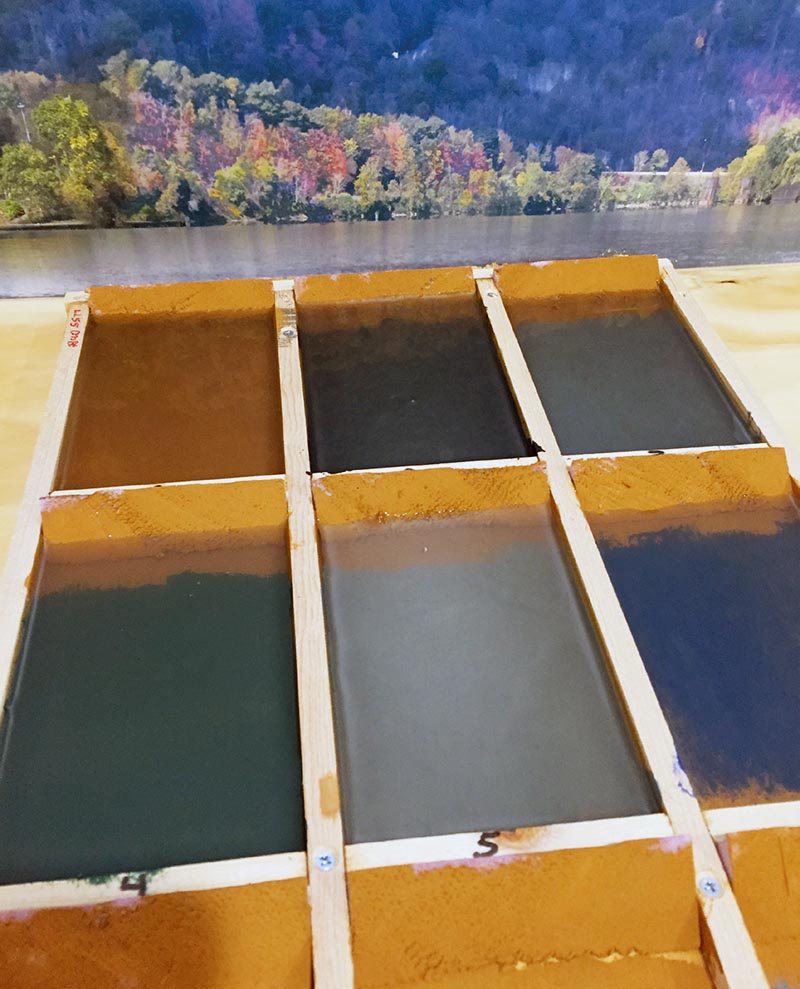
Figure 1: Test ponds for river bottom colors (No. 5 is the winner).
The Big Pour: Selecting the Water Product
I researched some of the water products available on the market. The cheap-est approach was to use a two-part clear epoxy, but the one I chose turned out to have a 72-hour cure time at 70 degrees. That was impractical; I would have to run a space heater unattended for most of three days. Many modelers, including a large club in my area, have used Envirotex Lite with good results, but it didn’t seem like the right approach. I was unaware of any method for making it murky and the club only used it for small streams or rivers. I wanted something that was geared to larger bodies of water, was part of a comprehensive system, had a proven track record, and would provide detailed instructions.
The Ohio is a deep, navigable river with no tumbling rapids, white water, or narrow valleys. The aver-age water depth is 15’ with main channel depths ranging from 22’ to 28.’ In short, it was anything but shallow or clear. And in the time frame I was modeling, the riv-er was often polluted and displayed many algae blooms. That pushed me toward a murky look. A test of Woodland Scenics’ Deep Pour Murky Water convinced me.

Figure 2: Mixing paint for the river bottom.
Riverbed Preparation
Perhaps the next biggest question was: what color should the river be? It was difficult. Simultaneously, the greatest help and the biggest challenge was the backdrop itself. We shot it on a beautiful day, October 9, 2017. The sky was blue, dotted with white puffy clouds, and the river’s colors ran the spectrum from thin chocolate to green to gray to blue, depending on the sky above or the color of the nearby shore. It was so inviting I could barely keep myself from jumping in. When RailroadBackdrops.com produced the final 41’ long river valley backdrop, it was absolutely glorious. Failing to match up to the backdrop would be an epic failure. No pressure, right?
It was the color of the river bottom that would drive the color of the water. The only viable approach was to test a large number of colors, which I did. I built two separate sets of test “ponds” (each 3×6”), painted them with an array of craft paint colors, and then poured Deep Pour Murky Water into them. Figure 1 shows some of the test ponds lined up against the backdrop. The winner was found in pond No. 5, a 10:1 ratio of Nantucket Blue to Golden Brown.
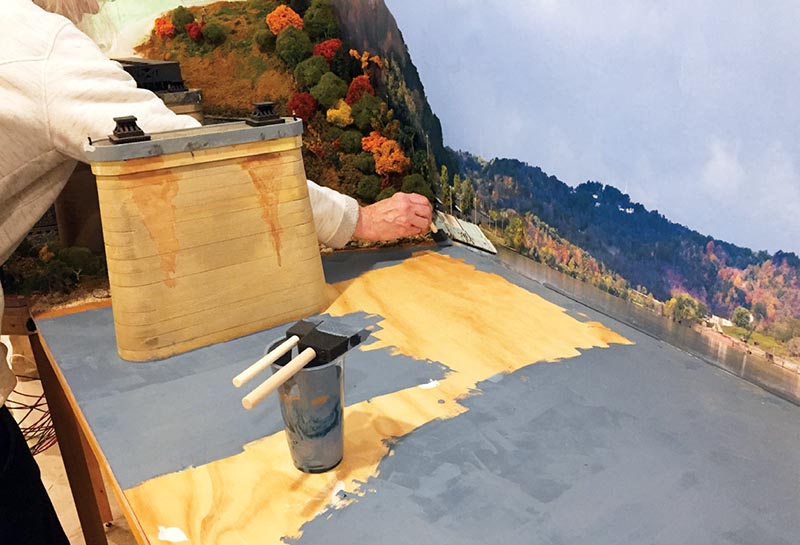
Figure 3: Painting the river bottom.
With the color selected, it was time to prepare the river bottom for pouring. All piers with navigation lights (west mid-channel, east mid-channel, Pier 2) were tested to make sure they worked. Then all piers were screwed to the plywood bottom of the river area. I painted the fascia, a 4” high piece of 1/8” Masonite, with Moroccan Henna, let it dry, and attached it to the benchwork at the front of the river area with drywall screws spaced 6” apart.
Painting the River Bottom
In a mixing cup, Judy and I dumped five two-ounce bottles of FolkArt Chalk Nantucket Blue (No. 6352) and about one ounce of Darice Golden Brown (No. 10120) together and mixed thor-oughly (Figure 2). Using sponge brushes, we then applied a first coat of paint to the entire river bottom (Figure 3). We then filled in the gaps between the shore and river using smaller brushes. The first coat was allowed to dry and then inspected. A second coat was necessary, which was applied and allowed to dry.
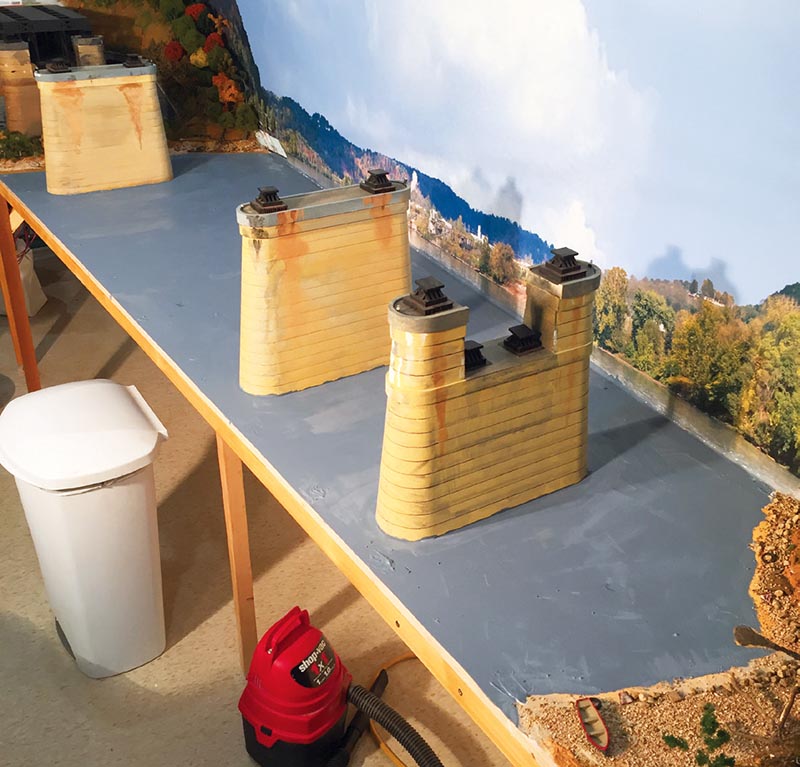
Figure 4: Completed river bottom.
Finally, Judy (she’s much better at this than I am) caulked around the piers, behind the fascia, and where the plywood river bottom met the backdrop (Figure 5). The riverbanks got a final touch-up of paint and the last details were applied. The boy with the inner tube was installed atop a clear plastic prop…