
 By Zach Pabis/photos by the author
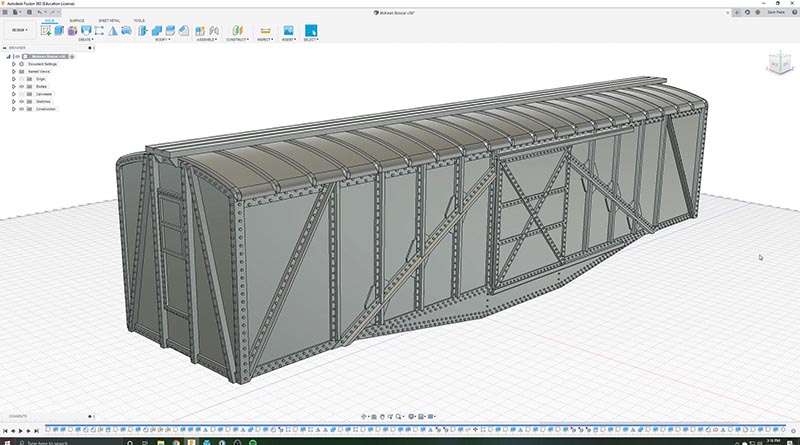
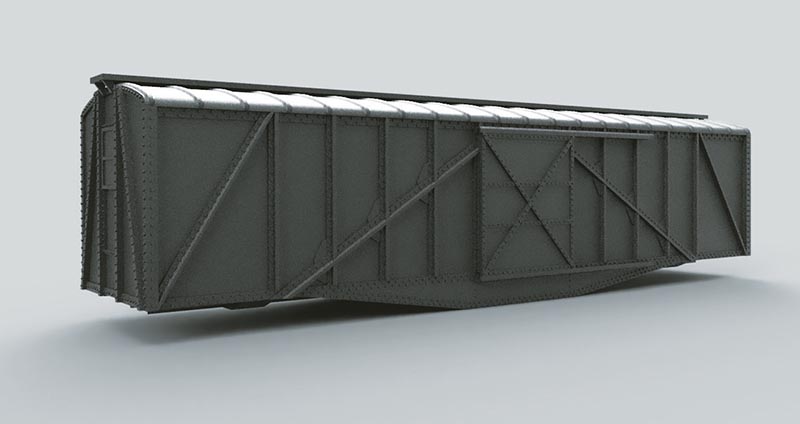
Three dimensional (3-D) printing is a cutting-edge technology, so for our first project it seems fitting to build something that was cutting-edge a little more than a century ago, an all-steel boxcar. While the McKeen Motor Car Co. was most well known for producing their signature streamlined self-propelled cars, they also dabbled in other kinds of rolling stock and equipment, as well as some of the first all-steel boxcars. At first glance, Union Pacific 72851 looks like a regular composite boxcar of the era, but behind the outside bracing is steel sheathing, not wood. The unique trusswork and fishbelly design of this car make it a perfect candidate for 3-D printing.
In this second installment of articles on 3-D printing, we will dive into the software side of 3-D printing, specifically using computer aided design (CAD) software to design your own models. Like model railroading as a whole, there are many types and skill levels within 3-D printing. For instance, there are many talented designers who only produce digital models for others to print or that will only be viewed on a screen. On the other hand, many 3-D printer owners have little design skill and only print designs that are available to download. Modelers of any skill level can use CAD and 3-D printing to supplement their modeling, but this technology is most powerful when used to create a truly unique design, and for that we will need to use 3-D modeling software.
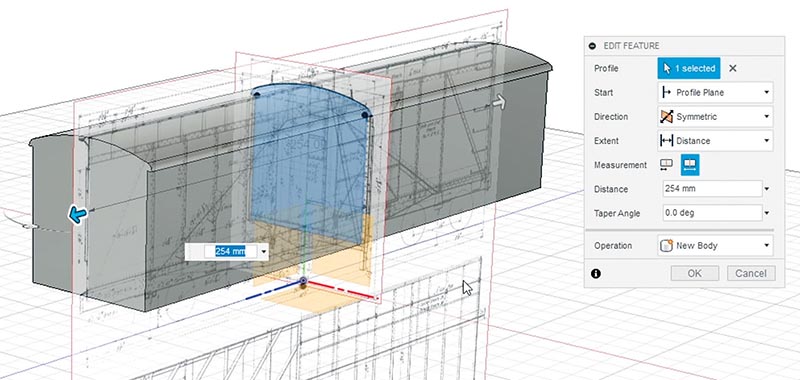
While there are many different types of CAD software, each with their own strengths and weak-nesses, we will be using Autodesk Fusion 360 as it is one of the most popular and powerful free offer-ings best suited for 3-D printing. It is compatible with other popular Autodesk products, like AutoCad, and is similar in functionality to professional modeling and engineering software like Solidworks. Fusion 360 has a massive suite of different fea-tures for creating objects, but its core functionality stems from sketching and extruding. In the sketch environment, the user is prompted to choose a plane, which can be a flat surface on an object or on planes defined by the XY, XZ, and YZ axes. On these surfaces, one can use basic shapes and elements like lines, rectangles, arcs, and circles to create 2-D shapes. This aspect of the software is similar to 2-D vector-based programs like Adobe Illustrator or CorelDraw.
Sketch elements can be placed freehand and subsequently given relationships or constraints. For example, a line can be dimensioned to 10mm and a circle can be constrained to be tangent to that line. Using dimensions and constraints is essential for creating precise and accurate parts and makes the modeling process much easier. To turn these 2-D sketches into 3-D features, they must be extruded into the third dimension. A sketch can be extruded out and away from an object to create volume, or it can be extruded into the object to cut and remove volume.
While Fusion 360 has many other tools to model more complex curves and shapes, the only other two that are needed for this project are the mirror tool and the pattern tool. You can imag-ine how difficult it would be to sketch a separate circle for every rivet! The following pictorial is not a step-by-step guide per se but an outline of how you can use this software to create digital models ready for 3-D printing…