
 by William W. Davis/photos by the author
A while back on a New Tracks Modeling Zoom meeting, OST editor Martin Brechbiel assembled an old Simpson wooden gondola kit. This kit goes back to the 1960s. I liked the car, so I asked Martin for the kit’s plans and he graciously sent me a copy. The instructions allow you to build either a 36’ or a 40’ car. I chose to build the 36’ version.
When I received the instructions, I was excited by the address. Back in the late 1960s I was at the Air Force station near the Bay Area. I was not actively building models at that time, but I was still well aware of the hobby. After all, I have been involved in model railroading since I was very young. Even though I wasn’t active at that time, I would attend model railroad clubs and meetings. One of the meetings I attended was at Russ Simpson’s hobby shop on School Street in Oakland (That address was on the kit instructions Martin sent me). That finescale modeler’s meeting profoundly altered my view of the hobby. There I met and saw the models of Bob Brown, Lee Klaus, Cliff Grandt, and Gordon Canon, to name just a few modelers. These guys were the pioneers of finescale model-ing. O scale finescale in those days was called 1/4 AAR. Today it is called Proto 48. I knew after seeing their models that was the scale and kind of modeling I wanted to do.
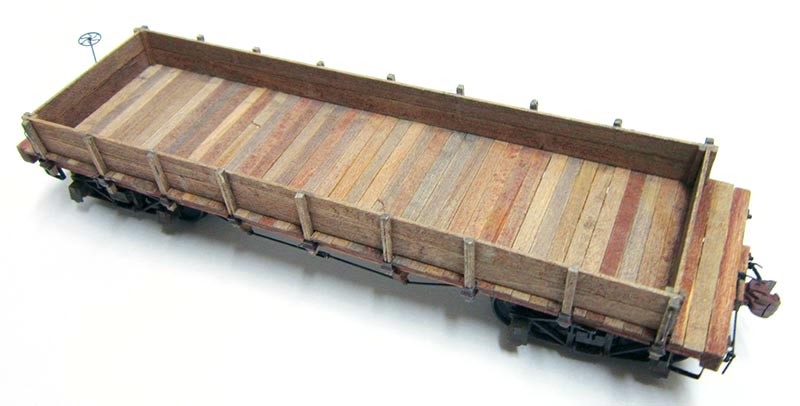
As with most models I build, I wanted this gondola as detailed as possible. The first step in building this car was gathering the needed parts. I had plenty of wood to cut, and you can see from the plans what sizes you need if you choose to build it. However, I also needed non-wood parts and detail castings.
After gathering the parts, I was ready to start building. I cut all the wood pieces, then grained and stained them. For staining, I use homemade gray and brown stains. These started as commercial stains, but through the years I keep adding paint, stain, etc. to them. This gives me varied coloration on my models. After all, all wood doesn’t age the same. Next, I added details to the various parts by adding nbws, stake pockets, queen-posts, and drilled the needed holes before final assembly.

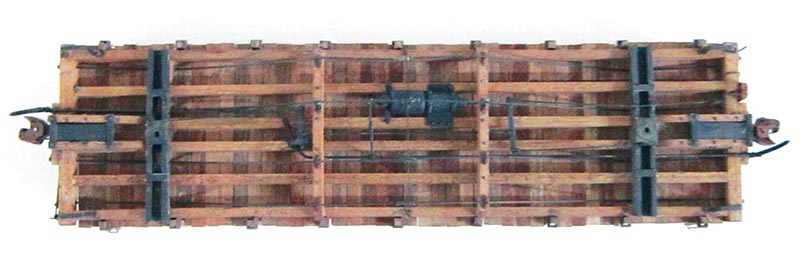
Once that was completed, the next step was to assemble the underframe. There are several ways to make an assembly jig. In this case I simply taped the plan to a piece of foam core and pinned the parts in place. If I was going to build several cars from this plan, I would have made an assembly jig out of styrene that could be used repeatedly.
Now that the frame was assembled, I started to add the underframe details. I was going to use a wooden body bolster, but found that it would not al-low for the correct coupler height. So I scratchbuilt a double I-beam bolster out of Evergreen I-beams, and sheet and strips from my styrene collection. Before I mounted the bolsters to the car, I drilled a truck-mounting hole through each bolster and glued a nut on the back side of the body bolster. I will mount the truck using a screw that will go through both the truck bolster and the body bolster, and then screw into the nut…