
 By Charles Goodrich/photos by the author
Flatcars are a vital part of a freight car fleet. Properly loaded, they add interest to a train as the load is visible. Beginning in the late 1930s, most flatcars manufactured were 50 ft. or longer. For the O scale modeler there are very few, if any, well-detailed 50 ft. flatcars available. In the moderately-priced arena only Lionel is currently offering flatcars; these are also three-rail models and require conversion for two-rail operation. Other brands can be found on eBay or possibly in stock at your local hobby shop. Brands that offered 50 ft. cars in the recent past include Weaver, Atlas, and Berkshire Valley.
The Weaver line was discontinued several years ago, but Weaver cars are still common on eBay and other internet sites at a moderate price. The prototype for this car was very common from the late 1930s through the steam-diesel transition years.
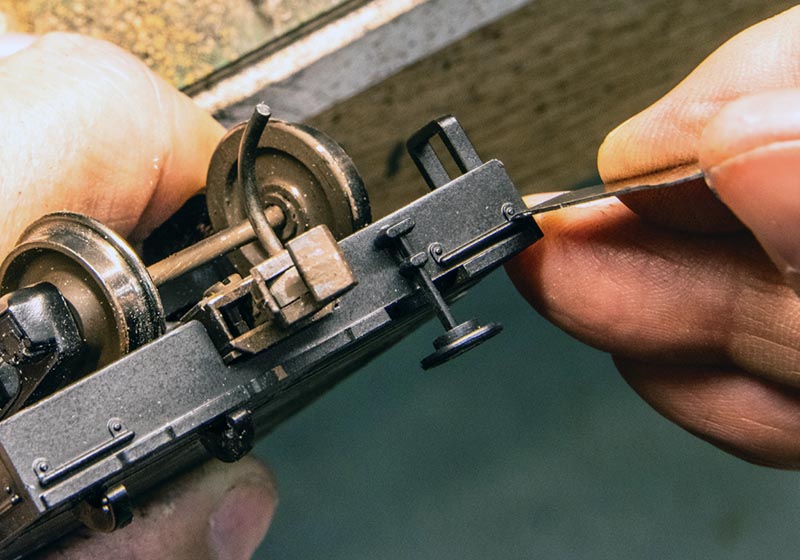
ABOVE: Make a cut just below the grab iron to help ensure that the bolt detail is not damaged when the grab iron is removed.
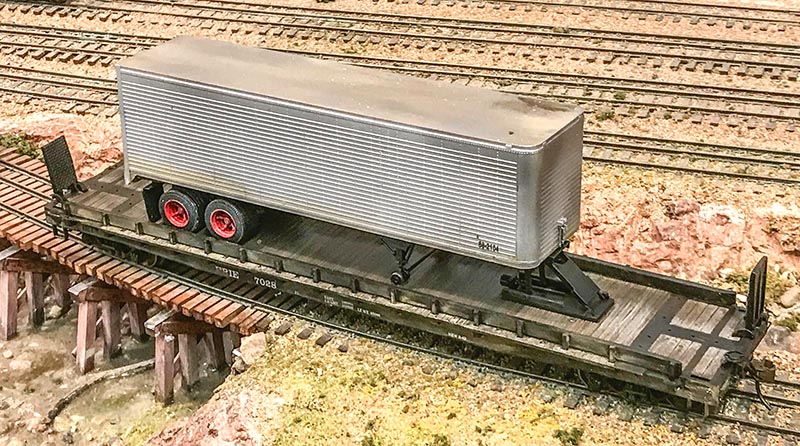
The Weaver car is the subject for this article. Weaver sold these as regular flat cars and as a TOFC version. The car is to scale but the detail is poor. For instance, there are no cut levers, the grab irons are cast on, the TOFC bridge plates are too tall, and the deck, which represents wood, is slick with no wood detail. This article describes what I did to improve the appearance of these cars.
Detailing will be done on a TOFC car, but the techniques apply to the regular flatcar as well. Start by removing the trailer hitch, bridge plates, and rub rail. For the TOFC version this will reduce the car to a standard flatcar configuration.
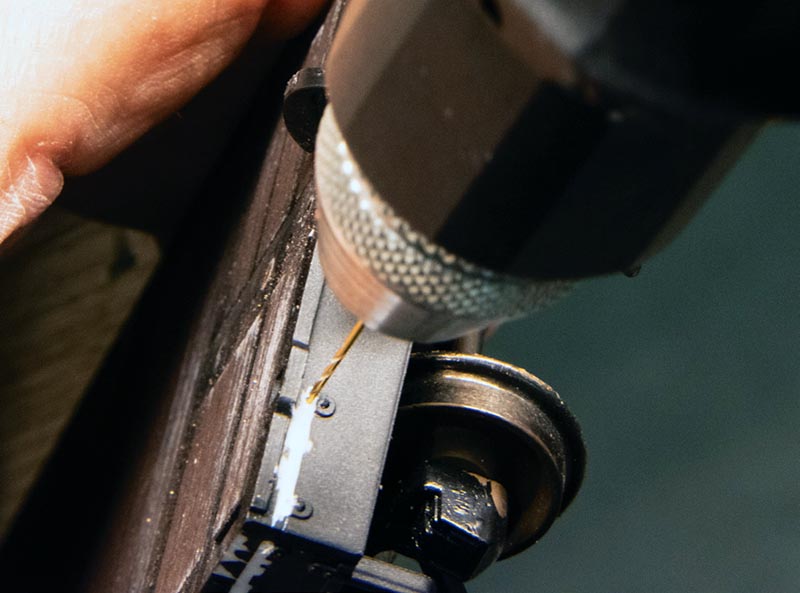
ABOVE: Drill the grab iron holes using a No. 72 bit.
The rub rails are removed first. I gently pried off the rub rails with a screwdriver. Don’t worry if some of the stakes break off as there will be enough that are not glued to retain the rail when it is rein-stalled. Next, remove the bridge plates. This is done by gently rotating the hinges far enough to remove the plates. Then, pry off the fifth wheel. Save these parts for later.
Use a chisel point in a No. 11 X-Acto knife handle to remove the cast-on grab irons. First, make a cut in the grab iron just below the horizontal portion. Next, cut the grab iron away leaving the cast-on rivet head in place. Take a dental probe and make a prick mark just above the rivet as a starting point for drilling the grab iron mounting holes.
Drill the mounting holes with a No. 72 drill (0.025” diameter). Note that I used 0.020” brass wire for my grab irons. This represents 0.96” diameter in the prototype. This is a little larger than the prototype but for me this size is easier to work with here. For a closer to prototype diameter, 0.016” diameter wire can be used. This represents 0.77” diameter in the prototype. If you use the smaller scale wire, drill the mounting holes with a No. 75 drill (0.021” diameter).
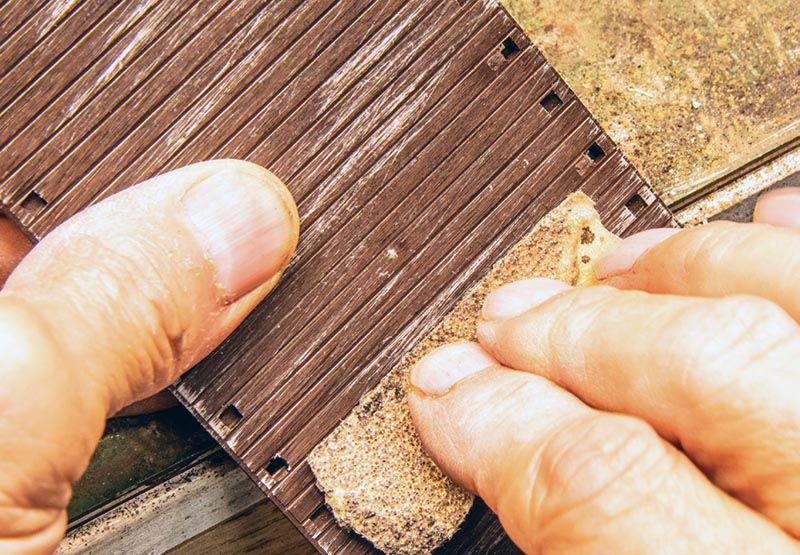
ABOVE: The wood portion of the deck is distressed with coarse (No. 60) sandpaper to represent old and cracked wood. Note that grain must run in the direction of the wood planks.
After the holes are drilled, bend the wire for the grab irons. First, bend one end at a 90-degree angle. The leg should be about 3/16” long. Place this end in one of the drilled holes and place bend-ing pliers so that the second drilled hole shows next to the pliers. Then bend the wire 90 degrees and cut it to length, about 3/16”. Cyanoacrylate adhesive (CA) is applied to the grab iron legs and they are inserted in the holes drilled earlier.
Space the grab irons at a distance that looks right and parallel to the car surface. If the iron is crooked, use a chisel point X-Acto to even it up before the glue sets. After all irons are installed, add more glue to the underside of the car to further secure the parts…