
 by Kurt Thompson
Tinker, tinker on. The word tinker is both a noun and a verb. As a noun, especially in former times, it described a person who traveled from place to place mending metal utensils as a way of making a living. As a verb, it is an attempt to repair or improve some-thing in a casual or desultory way, often to no useful effect.
How appropriate then that Tinker-CAD is around for those of us who are not formally trained in Computer Aided Drafting (CAD) or do not have access to any of the high-priced and extensive CAD programs such as AutoCAD, etc. TinkerCAD is a cloud-based, free program. It was initially developed by two Google engineers in 2011. Autodesk, the current owner, bought it from them in 2013.
As I commented in a prior column, TinkerCAD is appropriately named for me. I’m an ex-Navy nuclear operator and can read blueprints. However, I’m not a trained draftsman and have serious issues drawing two parallel lines with a straight edge. Part of the reason is that I do not have a place to set up a small drafting table. My hobby is model railroading, not model drafting. And the verb definition of “tinker” is appropriate to me (and maybe many other model railroaders).
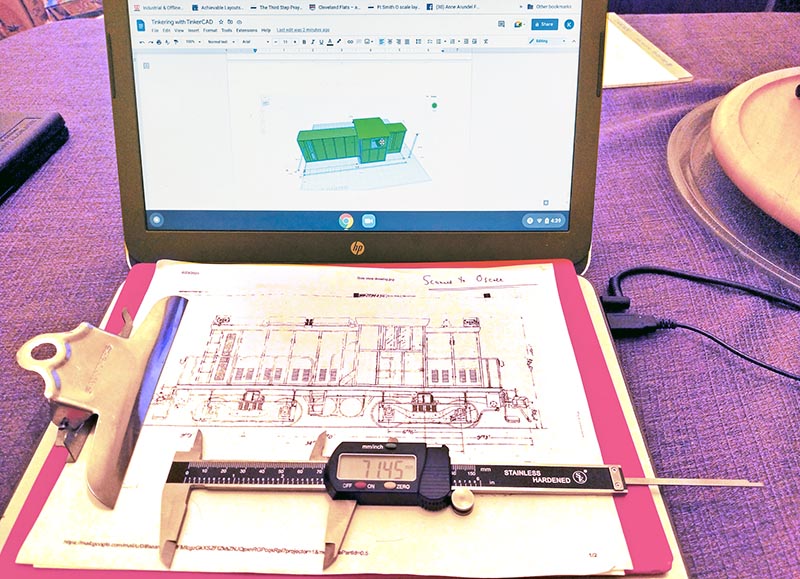
Using TinkerCAD is much like scratchbuilding with styrene. Before you panic that I’m using the word “scratchbuilding,” let’s agree on an approach. I’m going to walk through using TinkerCAD to build the superstructure (cab and hoods) for the Ingersoll Rand Bush Terminal locomotives. And just as if were you building it in styrene, beside your laptop with a mouse (which I highly recommend) [Some might prefer an optical trackball. —Ed.] there is a scale drawing of your project, a scale ruler, and caliper, digital recommended (Photo 1). Now we’ll get started with my leading you through the maze.
The first step is to prepare your digital workspace. Go to tinkercad.com and set up an account. Once you’ve done that, take some time to explore things and play with it. There are several tutorials provided that you can work through. They are self-paced and when I did them, I waltzed through them thinking I had a grasp of the process. I’ve gone back and revisited the tutorials as my grasp was not as firm as I had thought.
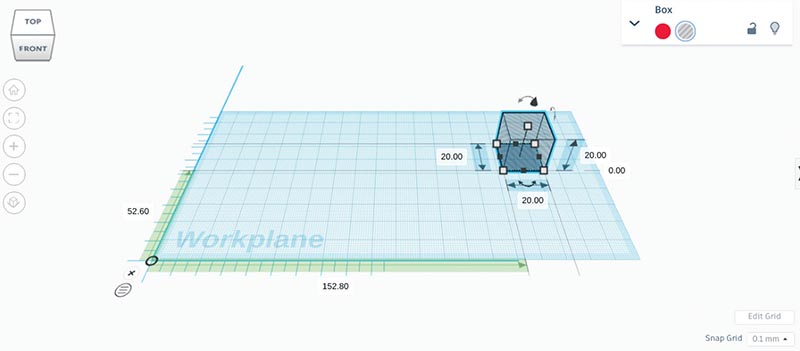
In the upper left you’ll see a strange-looking file name. In this case, it’s “Brilliant Jarv-Bruticus.” Don’t worry about it. You can change that name to something more meaningful to you, such as “Bush Terminal Sideframe” or “IR Superstructure.” Under the file name, there is a “magic” cube or die. Click on it with your mouse and give it a drag. As you rotate the cube, your workspace moves the same way. On the far right you’ll see the basic shapes menu. And down in the lower right corner you will see the snap grid (or scale) on the work plane. It defaults to 1.0 mm. On each new sketch, I change it to 0.1 mm. The final part I use to prepare my work area is to click on the “L” shaped ruler above the basic shapes and drag it down to the lower left corner of the work plane…