
 By Mark Nickelson/photos by the author
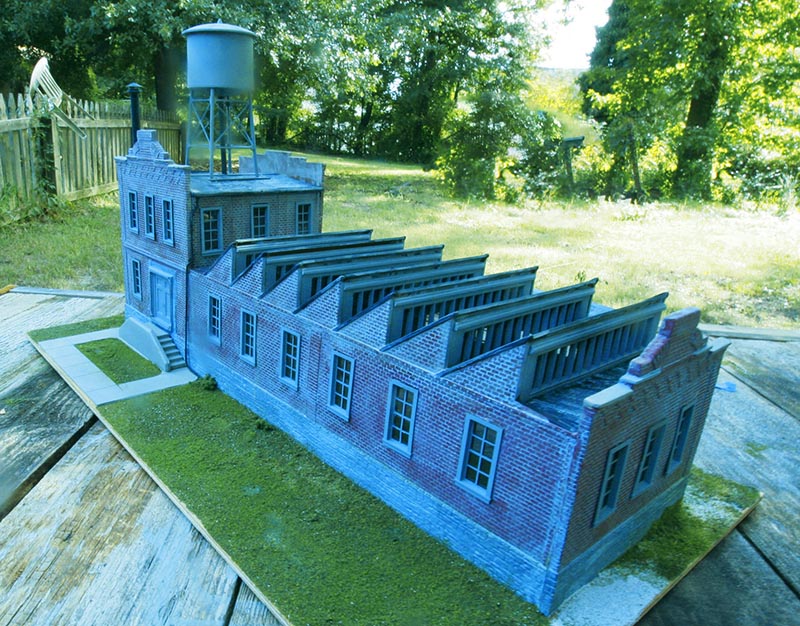
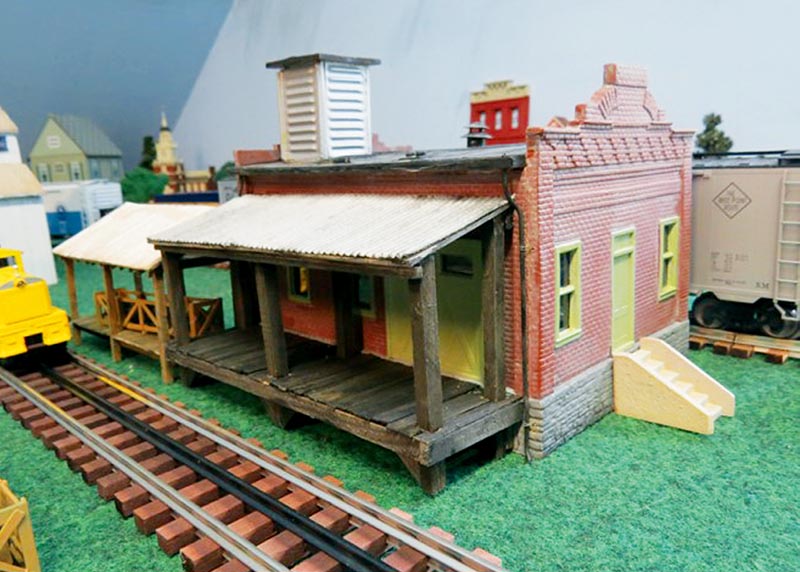
I’ve built three Korber factories and discovered by trial and error several things to do and other things to avoid. If you’ve struggled with one of these kits before, or haven’t yet tackled one, here’s some advice that’ll ensure you have a happy, brisk building experience. First, note that these comments apply to any urethane cast structure you’re going to build. Korber kits are in production in Indiana these days and there’s a lively aftermarket that includes used, beat-up kits that are eminently salvageable. And there are, of course, other urethane structure kits.
Why use urethane? The attraction is that you can get a large, atmospheric, durable structure on your pike for a very reasonable level of effort and cost. The best feature of a urethane kit is surface texture. Usually the kit maker delivers it in a rugged brick red paint finish, and you can simply rub it with acrylic tan or gray to detail the mortar. Beyond surface texture, it’s fairly easy material to work with and readily permits modification. It drills, cuts, sands, and paints just fine. So now, here are five simple ideas for making better urethane structures.
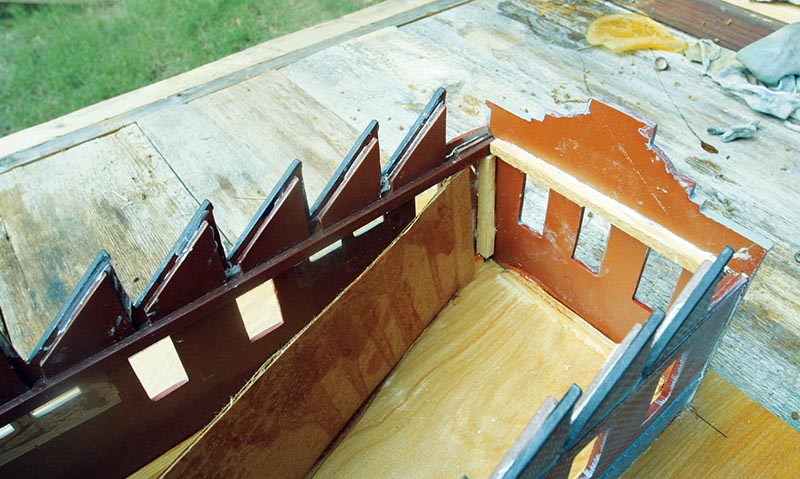
1. Getting Flat — Urethane panels tend to warp. Some in every kit will be bent. You don’t want to try to overcome this distortion at assembly. To get the panels to relax and lie flat, set them out on a flat surface, in a box you can close. Run a 100W light bulb into the box and close it. Ensure that the bulb does not actually touch a panel. The panels will get soft very quickly, and you obviously don’t want to overdo the softening. Check them after two minutes. Heat longer as needed. The trickiest part of this process is finding a traditional 100W incandescent bulb.
You will also hear of a process using low heat in your kitchen oven. Notice that this procedure is not being recommended here. Think of your next tuna casserole having a hint of urethane aroma in its seasoning. Think of ruining the wall panels, too.
2. Think Before You Act — This is simply a classic principle of kit building. As you familiarize yourself with a kit, you determine what to paint and when. Korber structures typically have brick siding. Some have dressed stone foundations. Most have molded-in window and door frames. If you plan the painting and assembly sequence, you’ll save effort.
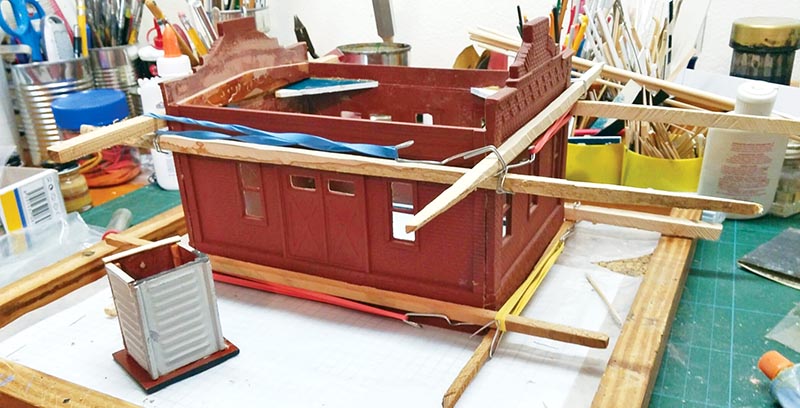
Now, before we start slinging paint, grab a scrap of sandpaper and a knife and clean off any flash, especially in the window openings. You may want to give all the urethane parts a soap and water wash, too. Washing helps with later weathering and paint rubs.
On those panels already colored brick red, you need to mask a lot. Never assume overspray won’t intrude. It always does. Mask off all the brick surfaces and then shoot the windows and doors. Model window frames are as tedious to paint as real ones. Spray painting is quick. Be sure to hit the window frame with spray angled in from all four sides, or else you’ll leave areas uncolored.
Then paint any secondary structural colors such as the dressed stone foundation. If I ever build another urethane structure, at this point I’ll pull off all of the masking and apply some Testors Dullcote to provide some tooth for the weathering washes.
Once all this painting is done, it’s time to attach window glazing on the inside of the panels. Notice that we’ve maneuvered around a major masking effort by glazing after painting. My glazing is usually some kind of salvaged Mylar. I attach glazing with Microscale Liquitape, a superb contact cement not found anywhere outside the hobby culture.
3. Of Bondage — In any gathering of modelers, I’ll be the guy who uses cyanoacrylate the least. I hate the stuff. It’s only been around 50 years, and I still haven’t mastered it. But I do use it on certain applications, like a metal wire sticking in a hole in wood or urethane. If the kit maker includes any verbiage in the instructions, he’ll expect you to build his factory with CA. On my first urethane factory, I naturally assembled with CA, twice. After the second time the panels all fell apart, I shifted to contact cement.
You may be a better super-gluer than I am, but at least keep an open mind about this. Walthers Goo does this job with ideal results. If you have some Weldwood or even the yellow 3M stuff you can find at the auto parts chain stores, they’ll work equally well. The classic technique for contact cement is to apply some to each surface of a joint and then allow it to blush, i.e. to surface-cure, usually about three minutes, and then press the parts to-gether for an instant, very strong bond. It’s a permanent bond, too, something that can’t be said of CA…