
 Review by William W. Davis/photos by the author
The first time I saw this kit on the Inter-Action Hobbies website I really wanted to build it; however, at that time it was only available in HO scale. Fortunately, they have now produced it in O scale.
Now this is a very complete kit! The majority of the model is laser-cut. There are also plastic and 3-D printed parts for some of the fine details, and a sheet of printed signs. As with its other O scale structure kit (the line side shed — see O Scale Trains No. 113), this kit includes an interior lighting system. The kit consists of 12 sheets of laser-cut wood for the walls and two sheets of resin impregnated card for the windows, doors, and sub-roofs. There is a sheet of laser-cut clear styrene for window glazing. Also included is a package of six 1/8” square stock for corners and bracing, and a 1/16” thick laser-cut cardstock sheet for the floors.
In addition to the printed sheet of signage, this also includes some printed interior details and front awnings in several different color patterns. For tarpaper roofing, there is a sheet of black paper. In the pack of detail parts were a 3-D printed chimney and two front corbels. There is a plastic smokejack and a pair of exterior light shades. Finally, there is a very complete set of illustrated step-by-step instructions. It is 21 pages with a couple additional sheets with layout drawing for the bracing and tinplate, and a sheet with color pictures of the pilot model. In addi-tion to all this is a sheet showing all the parts by their numbers, making it easy to locate what goes where as the numbers there do match the numbers in the instruction booklet.
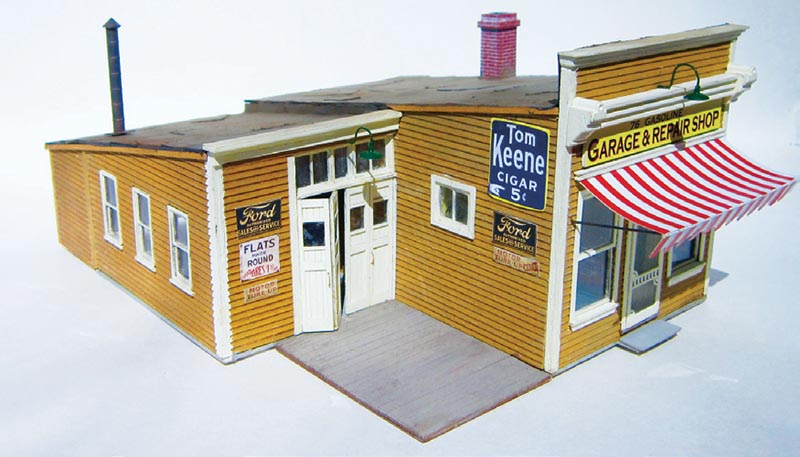
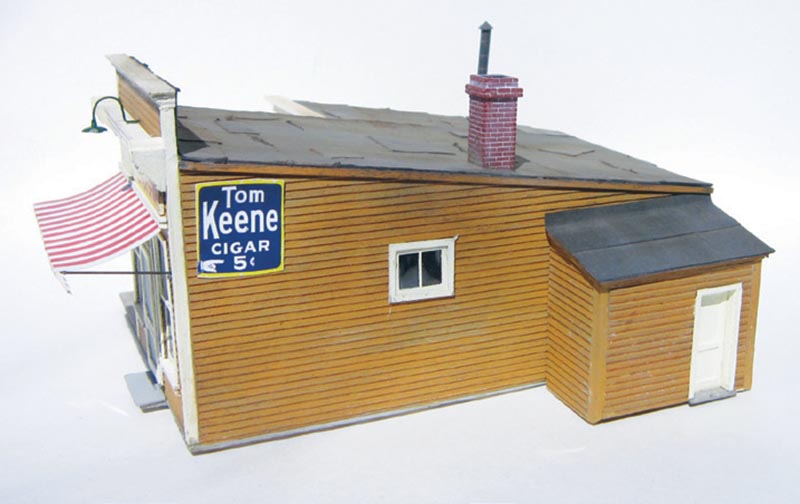
The main building is a scale 28’ 6’ deep x 15’ wide x 16-plus’ high in front. That is a nice size for a small store. The small shed addition to be located on right side is 12’ long x 6’ deep x 7’ 6” high. The garage addition which is a scale 16’ deep x 9’ 6” wide is on the other side of the main building.
After studying the instructions I discovered that there are several ways I could assemble this kit. The laser-cut walls are clapboard and the side walls are complete even though some parts of these clapboard walls are hidden with the additions. Be-cause these side walls have complete clapboard siding, you have many options for attaching the addition.
There is also enough material left over after the laser wall parts are removed from their carrier sheets to modify some of the walls. I decided to enlarge the garage area and move the addition from the right side to be part of the back of the garage.
I started by graining the clapboard siding with a wire brush followed by staining it. I didn’t want the grain-ing to be too heavy as I didn’t want an overly weathered look. I just wanted it to look as if it needed some paint on the back and side walls. I also grained and stained some of the carried sheet material so I could make the garage front wall match the width of the addition. For staining I used an oil-based paint, 502 Abteilung ABT100 Neutral Grey. Oils don’t warp the wood like acrylics and water-based stains. I painted walls, windows, and doors their final colors. Once these dried overnight, I moved on to assemble the walls into a building.
The front wall is the most interest-ing and detailed part of the kit and contains moret than 30 pieces. This is a very detailed design with the three different layers of cornice detail, one with the pair of 3-D printed corbels. There are also window and door de-tails. The front door had a nice screen door; however, the screen material was missing in my kit. Inter-Action Hobbies would have sent me the missing material, but because I have done many screens on my structure models (I model the south), I used some material I had in my parts bin. All these parts, including the window glazing, fit perfectly. To complete the storefront I added the provided sign-board. Inter-Action Hobbies provided several printed sign options. I chose the one that said “76 GASOLINE” on one line and a larger “GARAGE & REPAIR SHOP” on the line below. Once I assemble the rest of the walls, I will add the laser-cut awning.
With the front wall done, I worked through the garage section. As noted earlier, I decided to modify the garage design. Because I was putting the addition on the back of the garage, I needed to make the front wall as wide as the addition. A new garage front with a 4’ wide area on the left was fabricated using scrap pieces from the carrier sheets to match the other walls. Because I moved the addition to the back of the garage, I didn’t use the provided back wall of the garage. The only added pieces that didn’t come from the kit were some 1/8” square stock to support the interior and corners of the added addition. Otherwise, I assembled the walls as designed with the provided materials.
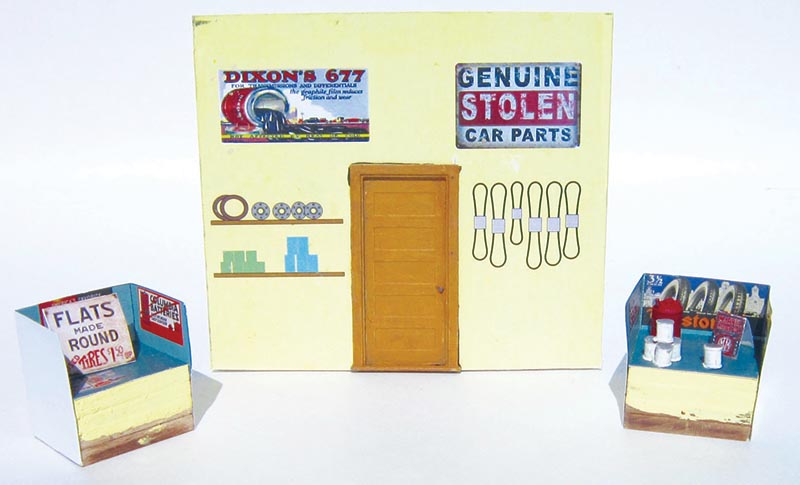
With the walls assembled I moved on to the interior details. The back interior wall was printed with a door, a couple shelves with car parts to the left of the door, and fan belts hanging on the right side. I built up the two window boxes, which consist of laser-cut blocks, and added the printed wraps. The instructions suggested adding some cans to provide detail in the windows. I added these and a gas can to the right window box and painted the side walls and part of the window box fronts a yellow to match the color of the back wall. It turned out the yellow on the front of the window boxes didn’t show. I glued these parts in place, and assembled and installed the lighting unit.
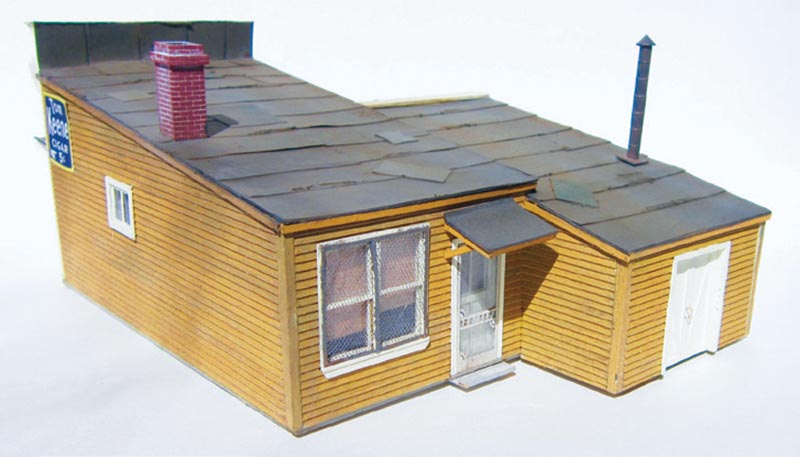
This left the roofs. The kit in-cluded laser-cut sub-roof pieces and a piece of heavy black sheet to represent tarpaper. Because of my modification of the garage width, I had to use a piece of very thin wood from my scrap box for coverage, but for the rest of the roofs I used what came with the kit. I added some extra 1/8” square stock to keep the roofs from sagging unrealistically. The sheet of “tarpaper” was cut into scale 3 1/2” wide strips and used to cover the sub-roofs. I added some patches and then weathered the roofs with chalks. Over the back door is a wooden awning and over the front an awning that is printed paper. The two plastic lampshades represented lights over the front wall sign and garage doors. Inter-Action provided tinplate to bend the wire for the awning support and the light shade supports, and to assemble the wooden awning over the back door.
Addendum: When I was finished, I still had the back of the garage wall that I didn’t use and enough siding material to build a pair of side walls. So I built a small addition on the right side where the former addition (now behind the garage) was supposed to be located. I converted the window to a door using pieces of the carrier for the dark brown laser pieces.
This is a wonderful, very complete, well designed and produced kit, as have been all the kits I have built from Inter-Action Hobbies. Nothing needed to be added to build this kit as designed. Even with my modifications, I was able to use the carrier pieces from the kit for that purpose. Everything fit perfectly and the instructions were easy to fol-low. This kit gave me a week of very enjoyable modeling time. I would highly recommend this or any other kit by Inter-Action Hobbies. I am looking forward to its next O scale offering.
Inter-Action Hobbies
P.O. Box 1021
Chase, BC V0E 1M0
Canada
Keeger’s Garage & Repair
Kit O-3103
MSRP: $72.95 Plus Shipping