 By Martin Brechbiel/photos by the author
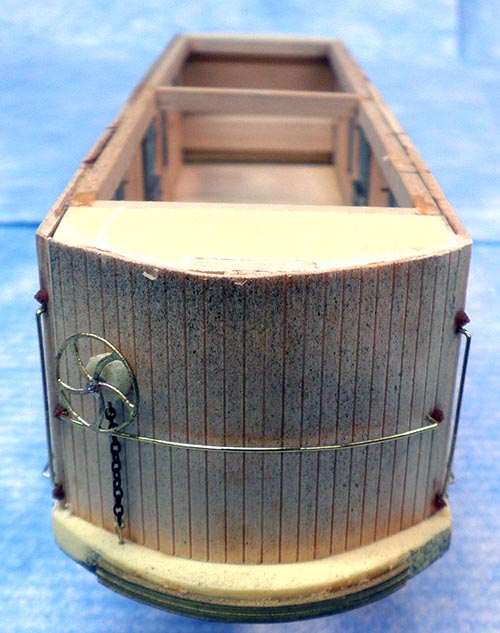
When last here I had pretty much arrived a point where final assembly was looking possible, along with the addition of a host of detail parts to complete this project. Starting in on the ends, both had outside edge vertical grabs added and a crossing horizontal grab fabricated from 0.025” brass wire (Clover House) with nbws (Tichy 8080) added to simulate mounting bolts. One end was chosen for mounting the brake gear, made from some styrene to simulate a gear box and a brass passenger brake wheel casting (PSC #40778). The gear box was connected down through the floor with a length of blackened chain that had a bit of 0.019” brass wire (Detail Associates) with holes drilled at each end to secure the chain (Photo 1).
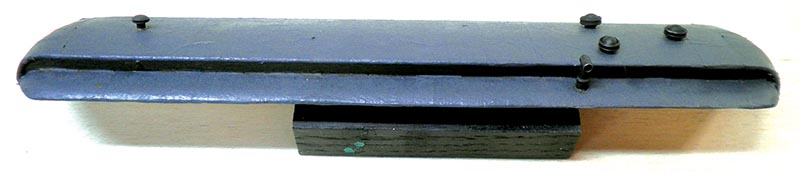
Returning to the roof, a smoke jack (Wagner C-21) was added along with four regular globe vents to keep it from being too stuffy for my employees sorting the mail and packages while traveling under the wire (Photo 2). Thereafter, the roof was glued down to the body shell and left to dry for a few days.
To wrap up the body exterior, trim boards (Kappler O scale 1”x6”) above the doors and windows were added. Door knobs (Pins) were added to the small arched doors along with pulls fabricated from 0.025” brass wire (Clover House) to the baggage doors. Now it’s time to travel back to the totally and all too often neglected underbody.
The underbody required at minimum a brake cylinder and some sort of truss rod support system for this car. A suitable brake cylinder (Q-Car C850) was chosen, the lever ends drilled to accept 0.025” wire, and then mounted to a scrap of scribed siding used to bridge two of the under-body floor beams. After the glue had set, two lengths of 0.025” brass wire (Clover House) were added to the brake lever ends that terminated under the car bolsters. The remains of a truss rod set (Wagner C-410) were used for the queen posts and turnbuckles. The truss rods were formed from more 0.025” brass wire, anchored to some brass angle mounted against the car bolsters at one end, and then connected at the other end with the turnbuckles.
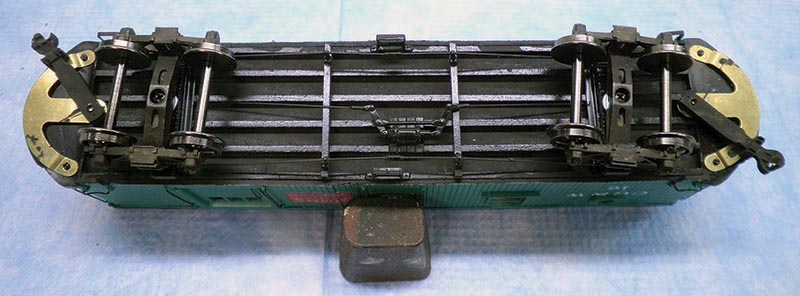
I added a pair of steps (Q-Car CS06) mounted from underneath for each of the smaller doors. The underbody was carefully rattle can painted flat black (Photo 3). Before painting, there were two more details to add, a pair of anti-climbers (Kentron X-903, substitute the comparable PSC part). These were trimmed a bit shorter with their curvature adjusted in a vise, and then mounted one per end with Goo and CA.
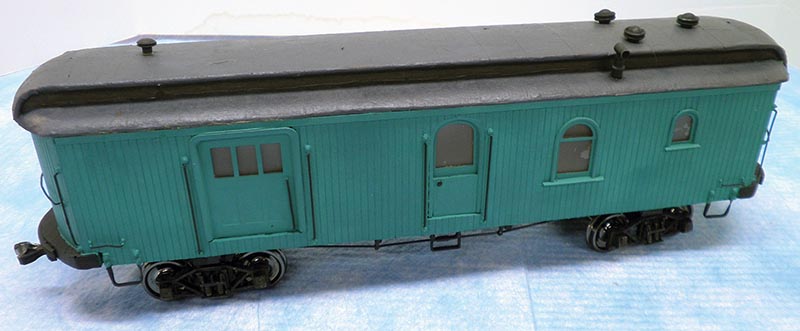
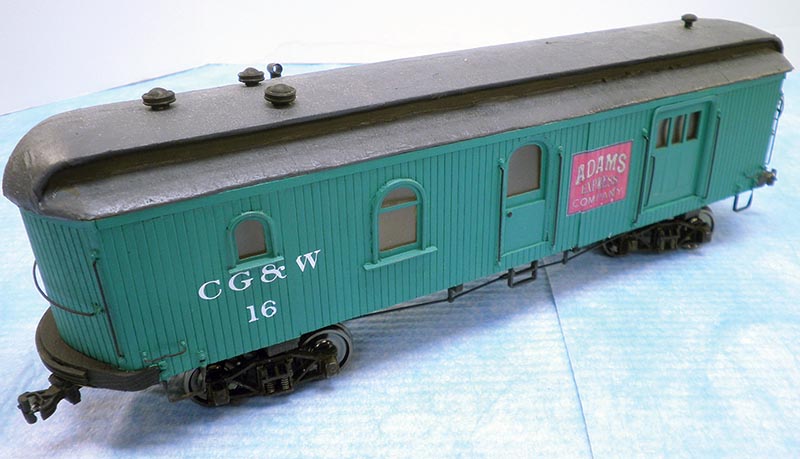
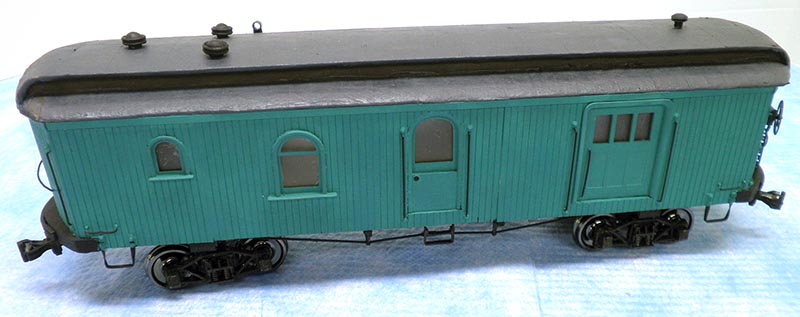
With the underbody painted, it was time to paint the rest of the car. I chose a bottle of Floquil off my paint rack that was near my usual Weyerhauser Green, except this wasn’t. In fact and truth I have no idea what this color really is since the label was missing. What I do know about this color is that I liked it. I gently brass wire brushed the car sides to remove the debris in the scribed siding, and hand painted the exterior using two coats letting it dry for a few days in between painting sessions. All of the iron work and detail parts and the ends where the anti-climbers were mounted were painted Steam Black (Polly Scale). The small deck areas on each end were painted Roof Brown (Polly Scale) (Photos 4, 5).
Now that the car was fully painted, it needed some lettering. I went with my usual line of the CG&W using dry transfers (Clover House), but I wanted something more on this car. I decided to add a decal for the Adams Express Co. I tracked down a few old signs and, after playing about with the images resizing them in PowerPoint, I made a sheet of decals on white decal paper using my venerable HP960c. After gloss coating the decal sheet, I cut out a pair of signs that fit the space, i.e., the correct size and applied them in the usual manner. After they were set, a coat of Rustoleum Matte was applied to seal all of the lettering.
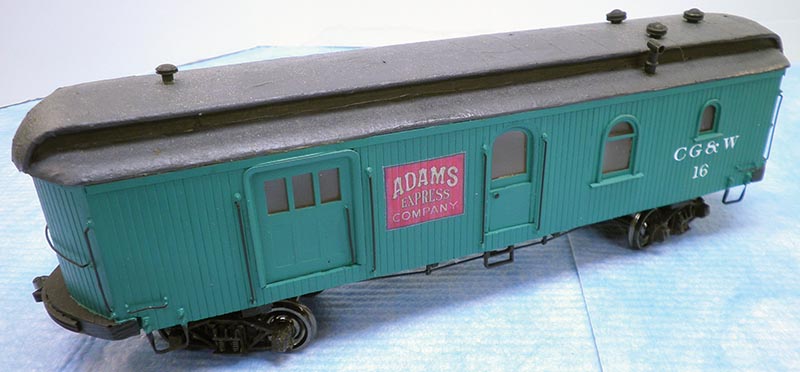
Final items to add were trucks and couplers, albeit in reverse order. Radial couplers (Current Line M-404) were mounted to each end using truncated #0 x 3/8” wood screws. Athearn archbar trucks with InterMountain wheelsets mounted to the car bolsters with 4/40 screws wrapped up this project (Photos 6, 7). I don’t know what’s next, but I’m betting it’s on top of the pile of projects stacked out in the hall-way next to my shop on that shelving unit that has a dubious future.